The Application
Quick Tour
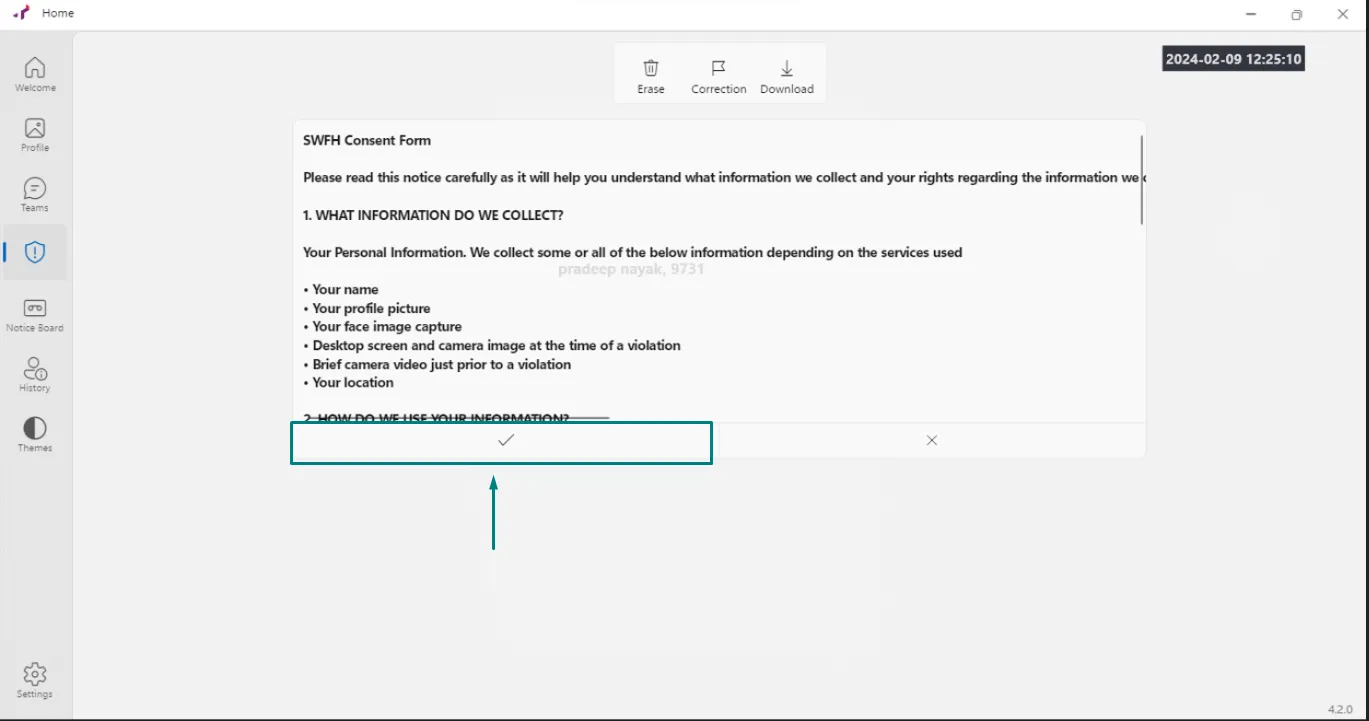
Once you have logged into the Secure Work from Home application for the first time , you will see a SWFH Consent form that needs to be accepted. This form mentions on the security aspects of the personal information thats being captured by the application. Please read through the form and click on the accept button.
Upon accept, you will see something like the below. Before we get into the details, let's give you a quick tour of the application (the login process is described further down).
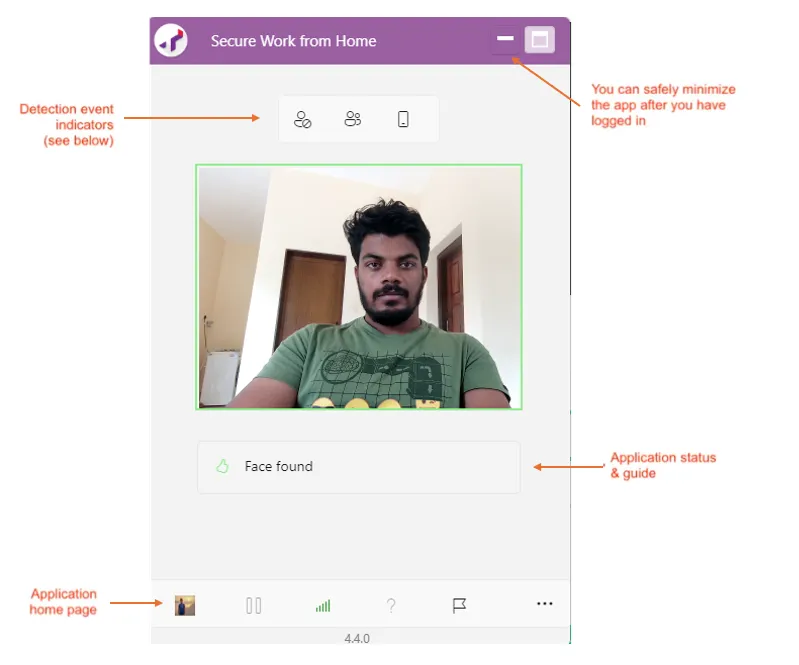
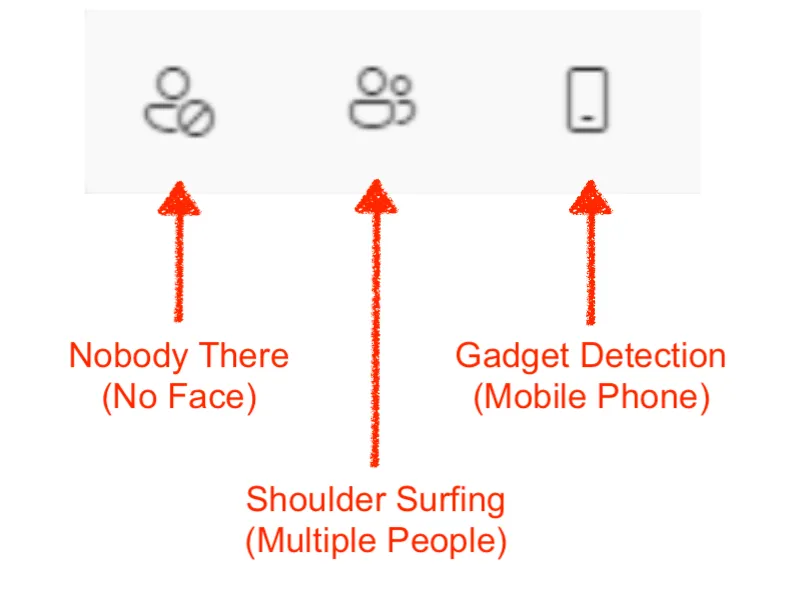
- Detection event indicators - These indicators light up depending on what the application detects.
- Application status & guide - These are messages that will tell you what the application is doing or what it may need you to do.
- Application home pages - Clicking on the home page button (your profile picture) will bring up several additional pages of information that can be useful.
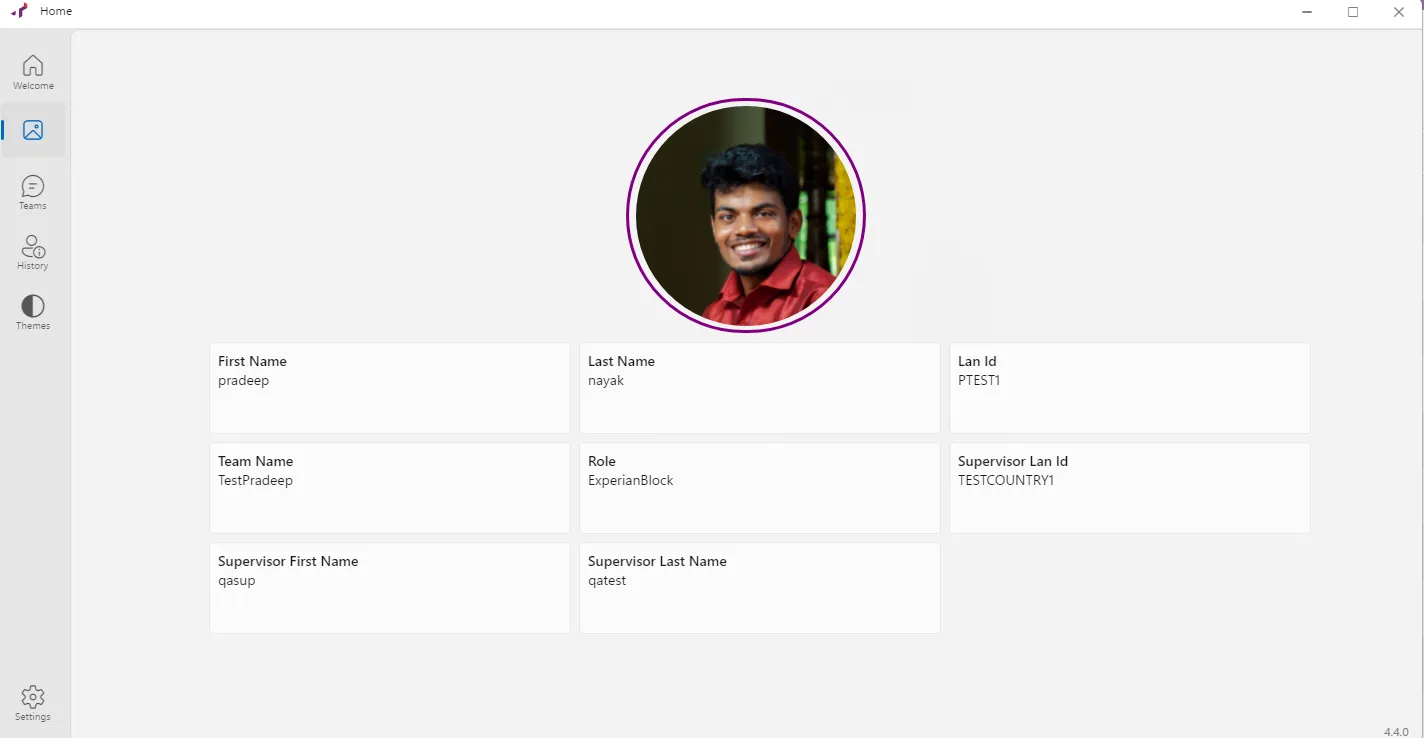
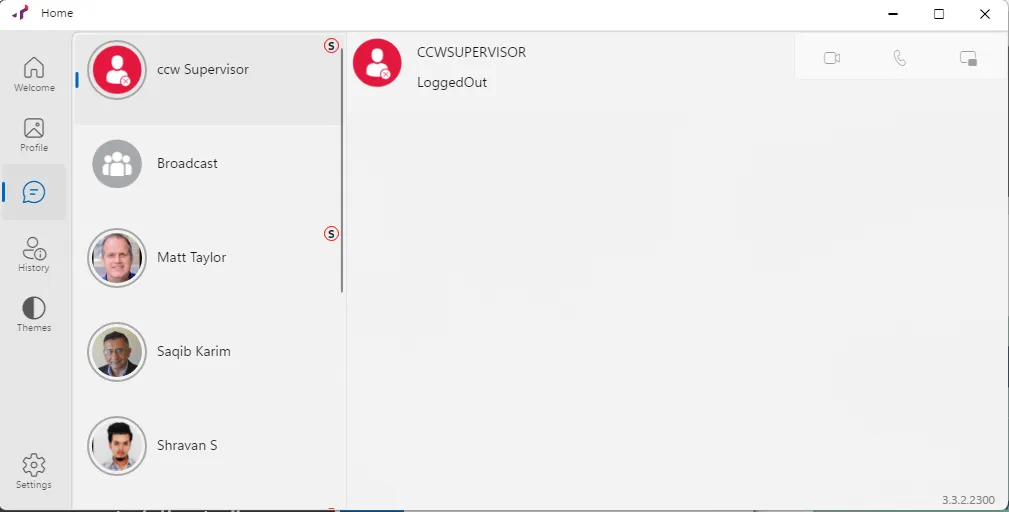
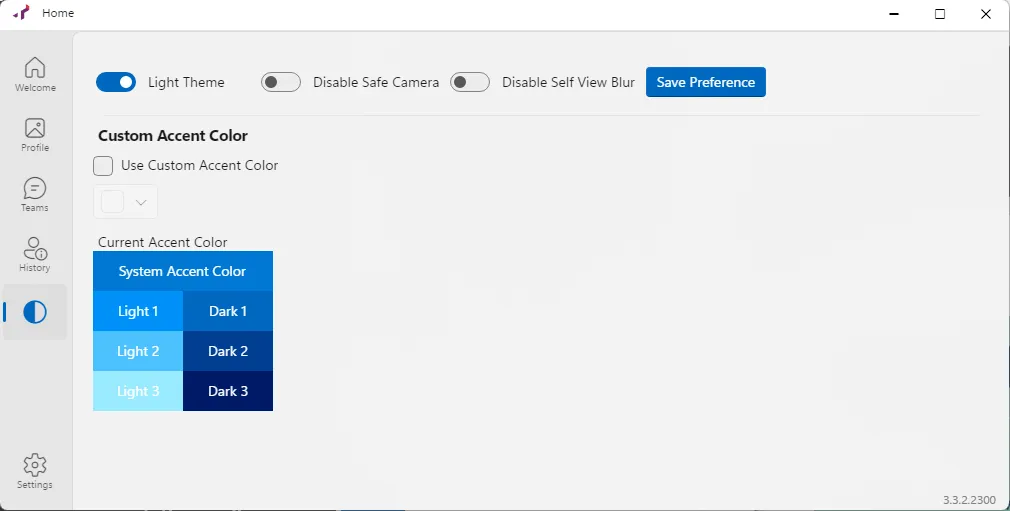
- Safe Camera is designed such a way that it is supposed to work on Client UI. Camera Pic and Camera Record both will be turned off to protect privacy by the Customer. For any case if record indeed is needed, agent will have to enable self view blur.
- There are other home pages which are more technical and can be of use to IT and others
- Application version information
- System information
- Application feature settings
- Environment variables
- Event history
- Licensing information
Notification Messages
In this particular field , you will get a lot notification alerts. These alerts are defined below -

Notification Message | When agent receive these notifications , it means |
|---|---|
Auto login will begin in 10 sec | If auto login is enabled user will get this notification |
Suitable face for authentication not available | During BG authentication, the face is not clearly visible. Need to align face to camera |
Keep looking into the screen to avoid violation | If user is looking away , and not into camera during BG Authentication. |
Face not found try again | during BG authentication if the user is not in front of the screen |
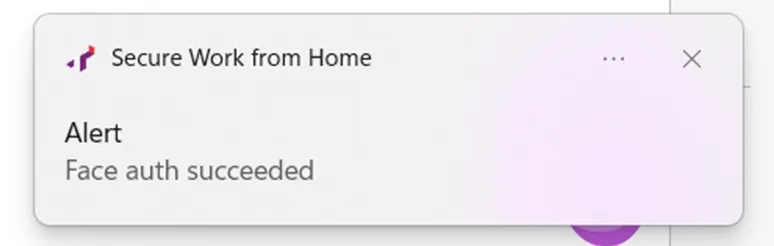
Face auth succeded | If BG auth succeded |
We raised No face detected | When No face event is raised |
We raised a Gadget detected | When gadget is detected, and an event is raised. |
We raised a Multiple face detected | When Multiple face detected , and an event is raised. |
We raied a removable drive detected | When USB device is connected, and an event is raised. |
Chat Notification | When supervisor send message to agent |
More Details
The following sections describe what you can expect when using the Secure Work from Home application. Note that the application can be configured differently for each company and even each team. This help describes the most common configurations.
Startup & Login
When you reboot or login to your computer, the application will typically start automatically - this is called Auto Login.
NOTE: If the application does not start automatically, contact your IT support team. Either Auto Login can be enabled by the system administrators, or your support team can guide you on how to start the application manually (by double clicking on the Secure Work from Home icon which should appear on your desktop).
If your company uses SSO (Single Sign-On), you will have done your typical login process to your computer and the enterprise network. If you are not sure if your company uses SSO and if the Secure Work from Home application is connected to it, consult your IT support.
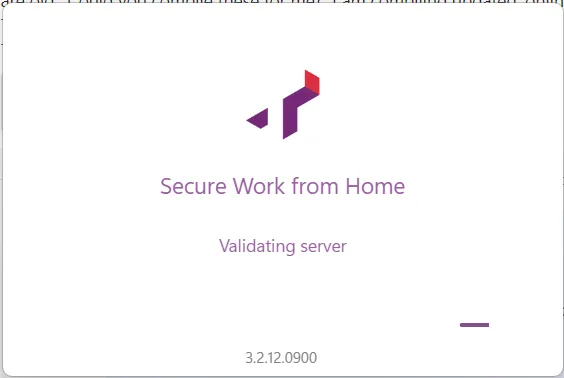
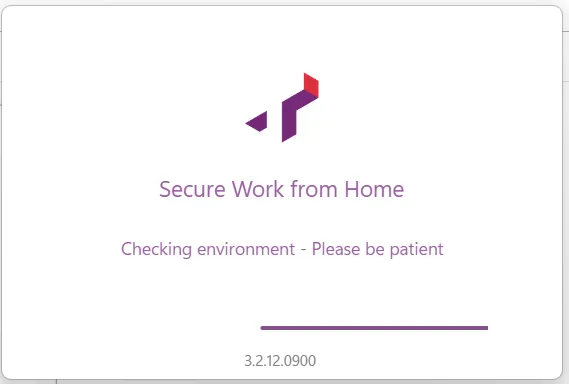
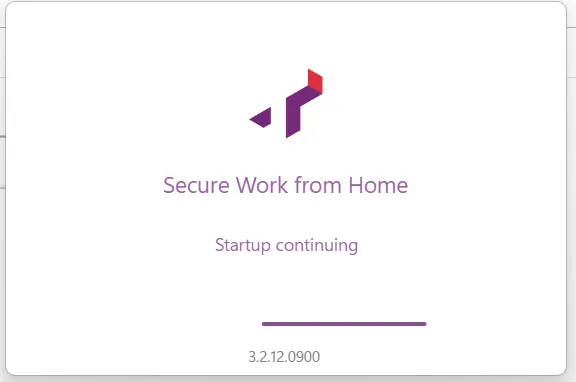
As the application starts up, you will see its progress messages similar to the ones below on the screen.
Agent ID Login
The first part of logging into the application is you identifying who you are by providing your agent ID. The experience you have at this point will depend on whether the application is using your SSO login or not. If you have SSO integrated with the application, then the application will automatically fill in your agent ID and log you in.
If you don't have SSO, then you will be presented with a screen something like the below image. Enter the Agent ID provided by your IT team in the "Enter your AgentId" just below the video of your face. If there is already some text in this field (e.g., the name of your computer) that is not the Agent ID you were provided, delete what is there and enter your Agent ID.
Click on "Verify ID". Assuming you entered a valid ID, you will move on to the Face Login step.
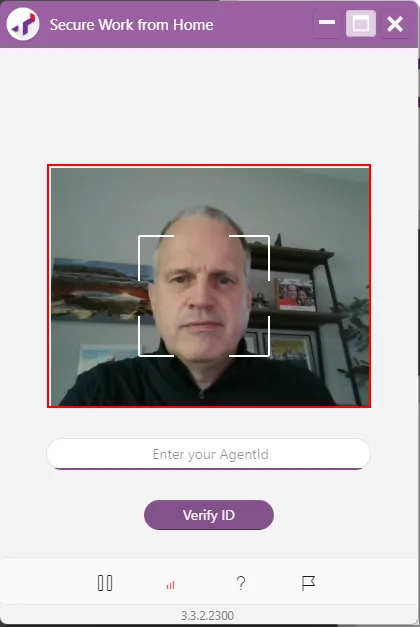
NOTE: You will only need to perform Agent ID Login once on a given computer. If a different person needs to use your computer and perform their own Agent ID Login step, they will click on the "Switch User" button which will appear once login is completed. This will allow them to perform their own Agent ID Login.
Face Login
After Agent ID Login, the next step is Face Login -- this is verifying that you are who you say you are. This is done using face authentication which compares what the camera sees with the profile picture you supplied and which is associated with your agent ID.
Once your Agent ID has been verified and the application has found your face in the camera, it will let you know with a message at the top "Face found... you can try to login now".
Click on "Face Login". Assuming you are who you say you are and the profile picture is of you, your face should be authenticated and face login completed.
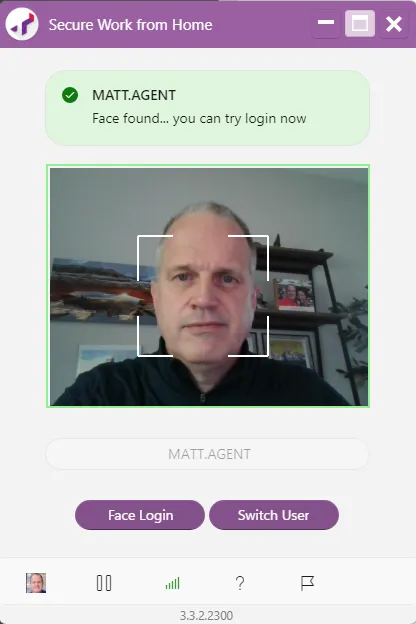
When you are doing a face login, the application will give you hints about centering your face in the box and ensuring there is appropriate lighting on your face. Face authentication can still succeed even with less than optimal positioning and lighting; however, you are more likely to have success if you follow the guidance.
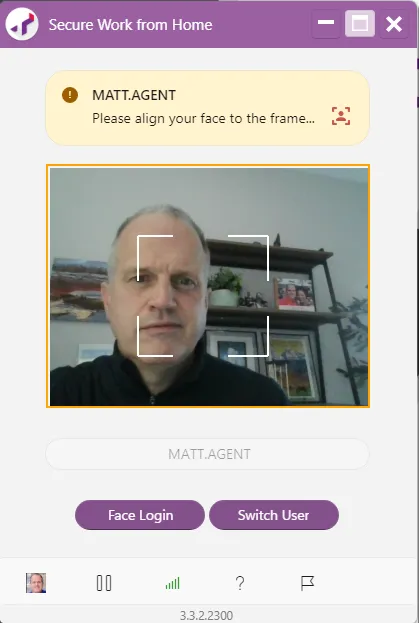
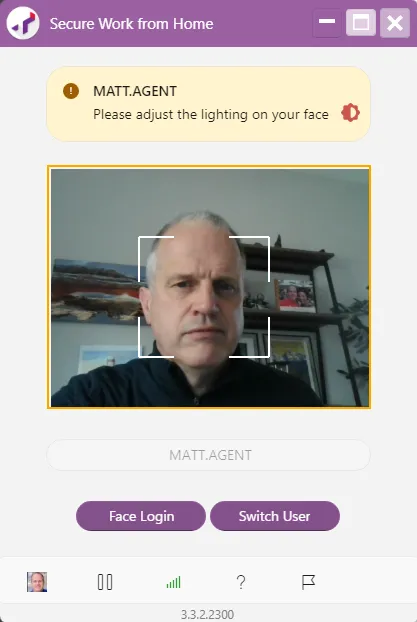
NOTE: Unlike Agent ID Login, which you only need to do once, Face Login is done each time you restart or logout/login to your computer.
Face Authentication
As described before, face authentication is validating that you match the profile picture of you in the system.
An aligned face towards the camera will help in successful face authentication.
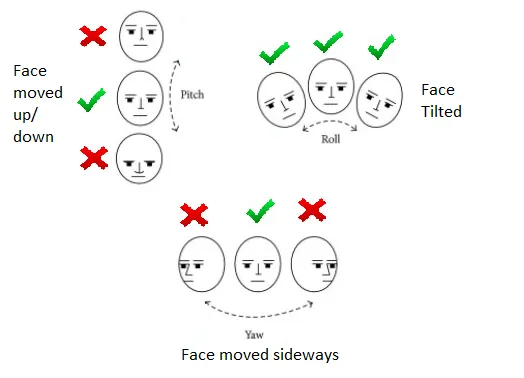
There are 2 types of face authentication performed by the application.
- Face Login - this is the initial face authentication described above.
- Background Face Authentication - this face authentication happens on an on-going basis throughout the day while you are logged in. How often it occurs depends on how your system has been configured. A common time between background face authentications is 5 minutes. Background face authentication occurs even if your application is minimized. If the application cannot authenticate the face it sees in the camera with your profile picture, it will generate an event which your supervisor can see. The application may also be configured to either put your Windows asleep (requiring you to re-enter your password) or lock your screen and require a one-time password (an OTP, which you must request from your supervisor).
Whenever authentication is in progress , a message in Application message box will be shown as

If background authentication fails , the message is shown to indicate / inform you to align your face to the camera.
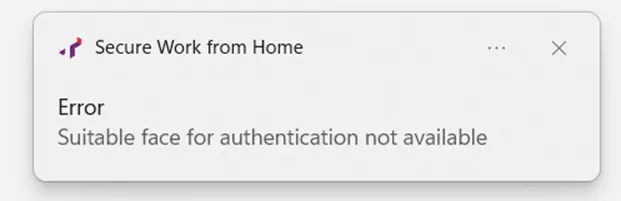
If background authentication passes, you will get the below message as a notification.
Tips for successfull Face/Background authentication
TIP: Face authentication wants to be able to see your eyes (the irises, specifically), so make sure both of your eyes are visible and not blocked by shadow or by glare on glasses or by your head being turned.
For notifications on right hand corner , please disable focus assist on your system.
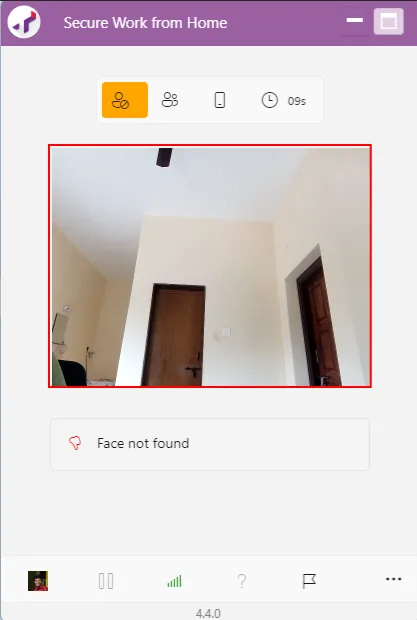
Nobody There (No Face)
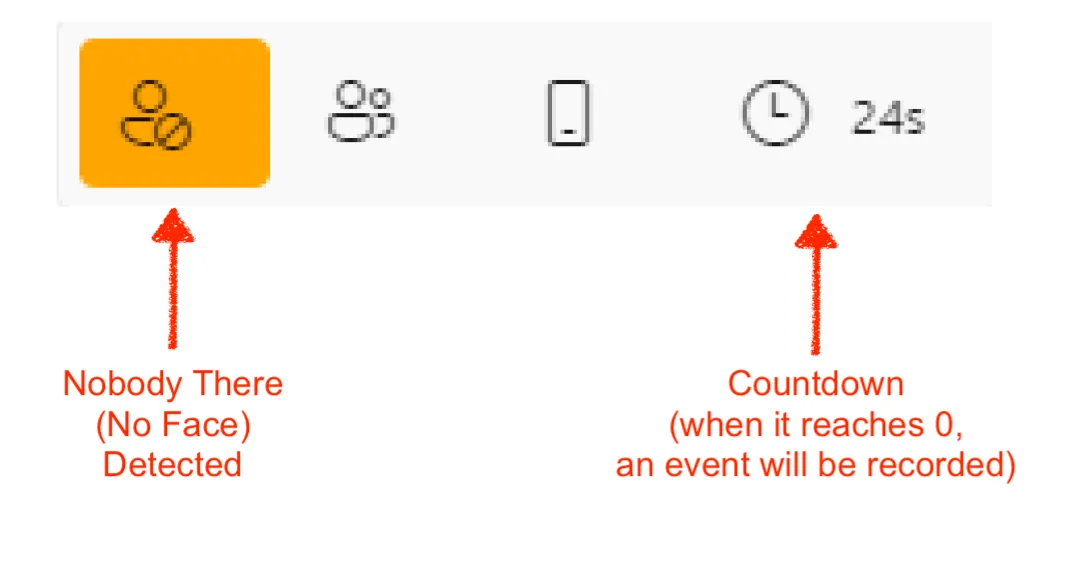
A common event that may be raised is "No Face". This event is raised if your screen is still active (you haven't put it to sleep) and the application does not see anyone there. This event is important for data security because it can make sure either you are there or your screen is locked (configurable).
A common configuration for this event is to provide a countdown before doing anything so that you have. a chance to come back into view. Then when the countdown completes, if it still does not see you, it is common to configure the system to lock your computer screen. This is the standard "sleep" you see on your Windows computer and only requires you to enter your password to get back to work.
Person Detection
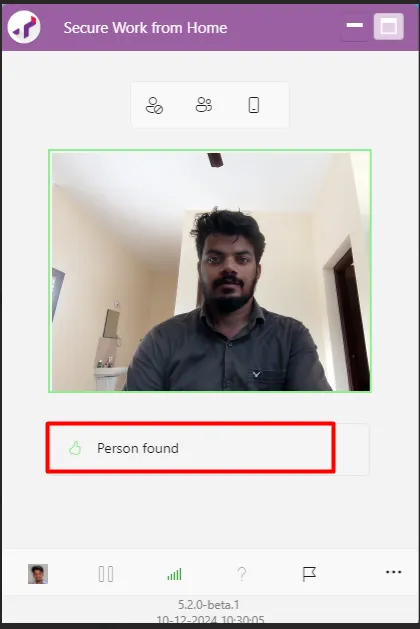
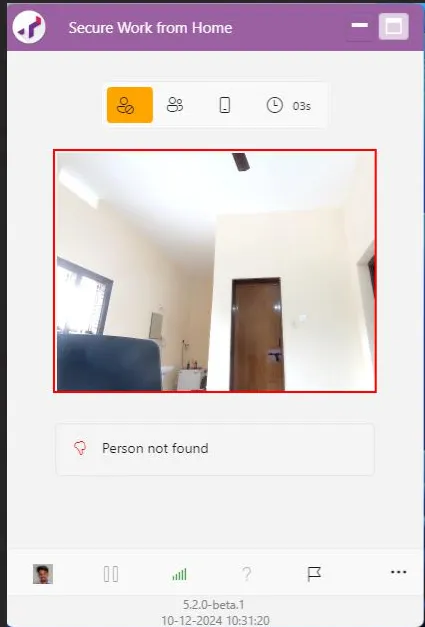
This is an advanced feature designed to recognize the presence of individuals in the camera's field of view. Unlike traditional face detection systems, which specifically focus on identifying and analyzing facial features, person detection determines whether a person, regardless of orientation or visibility of the face, is present in the camera frame.
When the option in OCM is set to person detection, the detection is done if the person is found in the camera , there is no lock/block. However if there is no person detected, the system raises a lock/block event as configured.
This is an alternative option to "No-Face" Event.
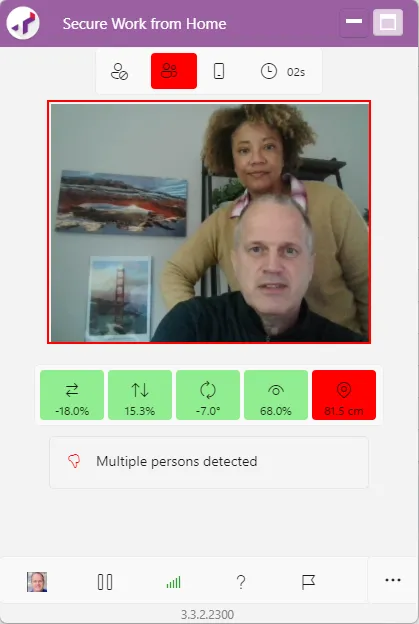
Shoulder Surfing (Multiple Faces)
Since you may have important customer information on your screen, another event that can be raised is "Multiple Faces" detected -- someone looking over your shoulder at the screen. This is sometimes referred to as shoulder surfing. A common configuration for this event is to lock the screen so the other person cannot see what is on your screen.
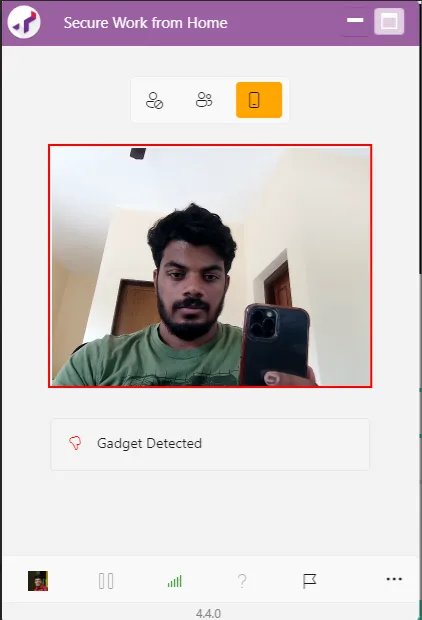
Gadget Detection (Mobile Phone)
Using a mobile phone while working with customer data is a security concern due to the camera on the phone. Your company may enable "Gadget Detection" which looks for mobile phones and may configure the system to simply notify your supervisor or it may be more aggressive and lock your screen and require a one-time passcode be entered.
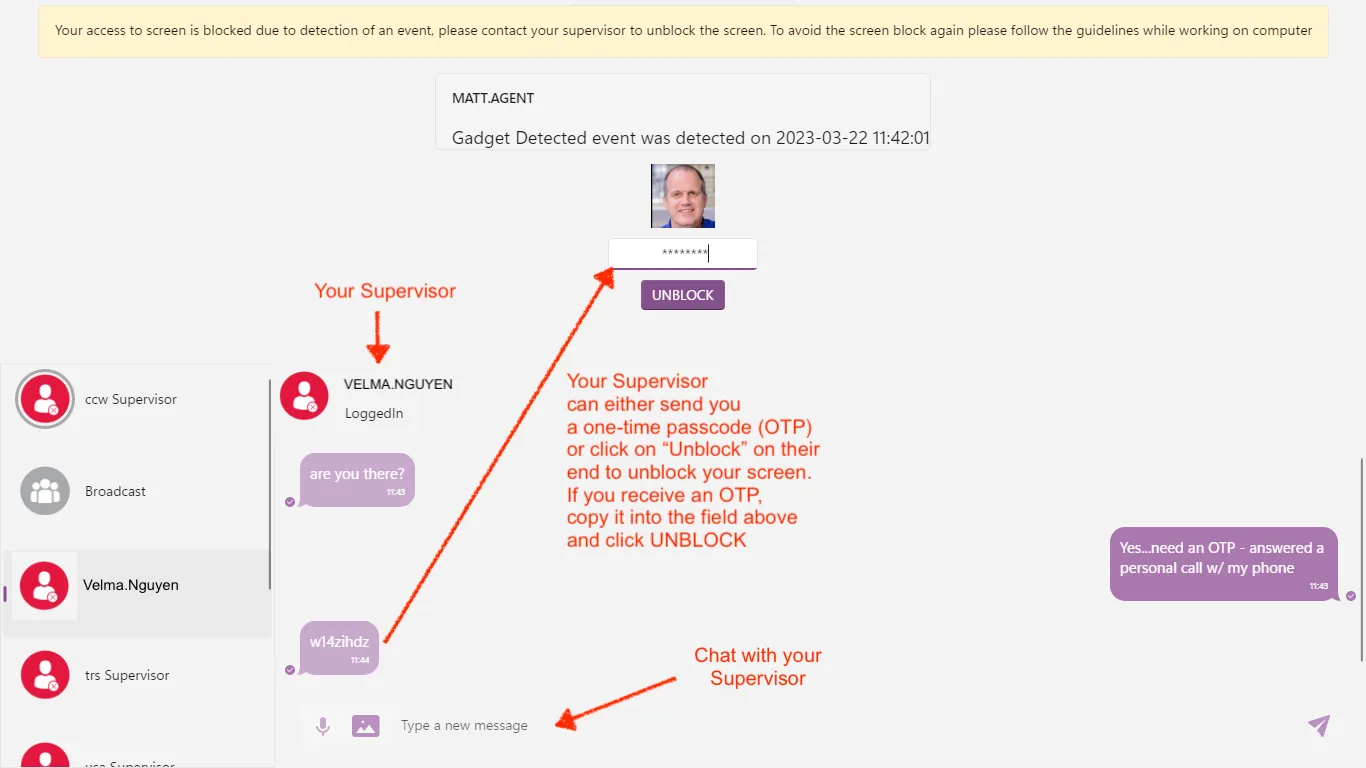
Screen Lock - Entering an OTP
Your company may choose to lock your screen when certain events occur. If this happens, you will see a screen similar to the below. Until you either enter a one-time passcode (OTP) received from your supervisor or your supervisor unlocks your screen from their end, you will not be able to continue working.
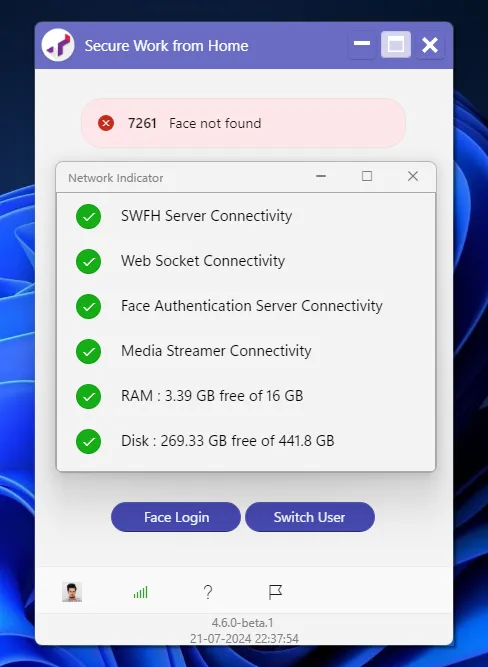
Network Connectivity check
Whenever the user clicks on the network icon in the UI -

A popup will appear that will show the connectivity checks. This feature will help when the agent is not able to login .
The screenshot will help for troubleshooting tasks.
External Camera position and placement
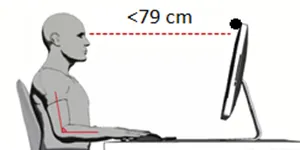
The external camera should be placed just above the laptop/desktop screen facing the user. Seating position should be such that the face is aligned into the camera frame in SWFH app
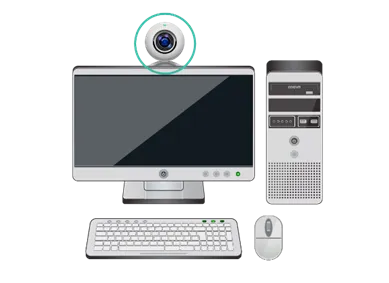
The distance from the camera should be less than 79cm .
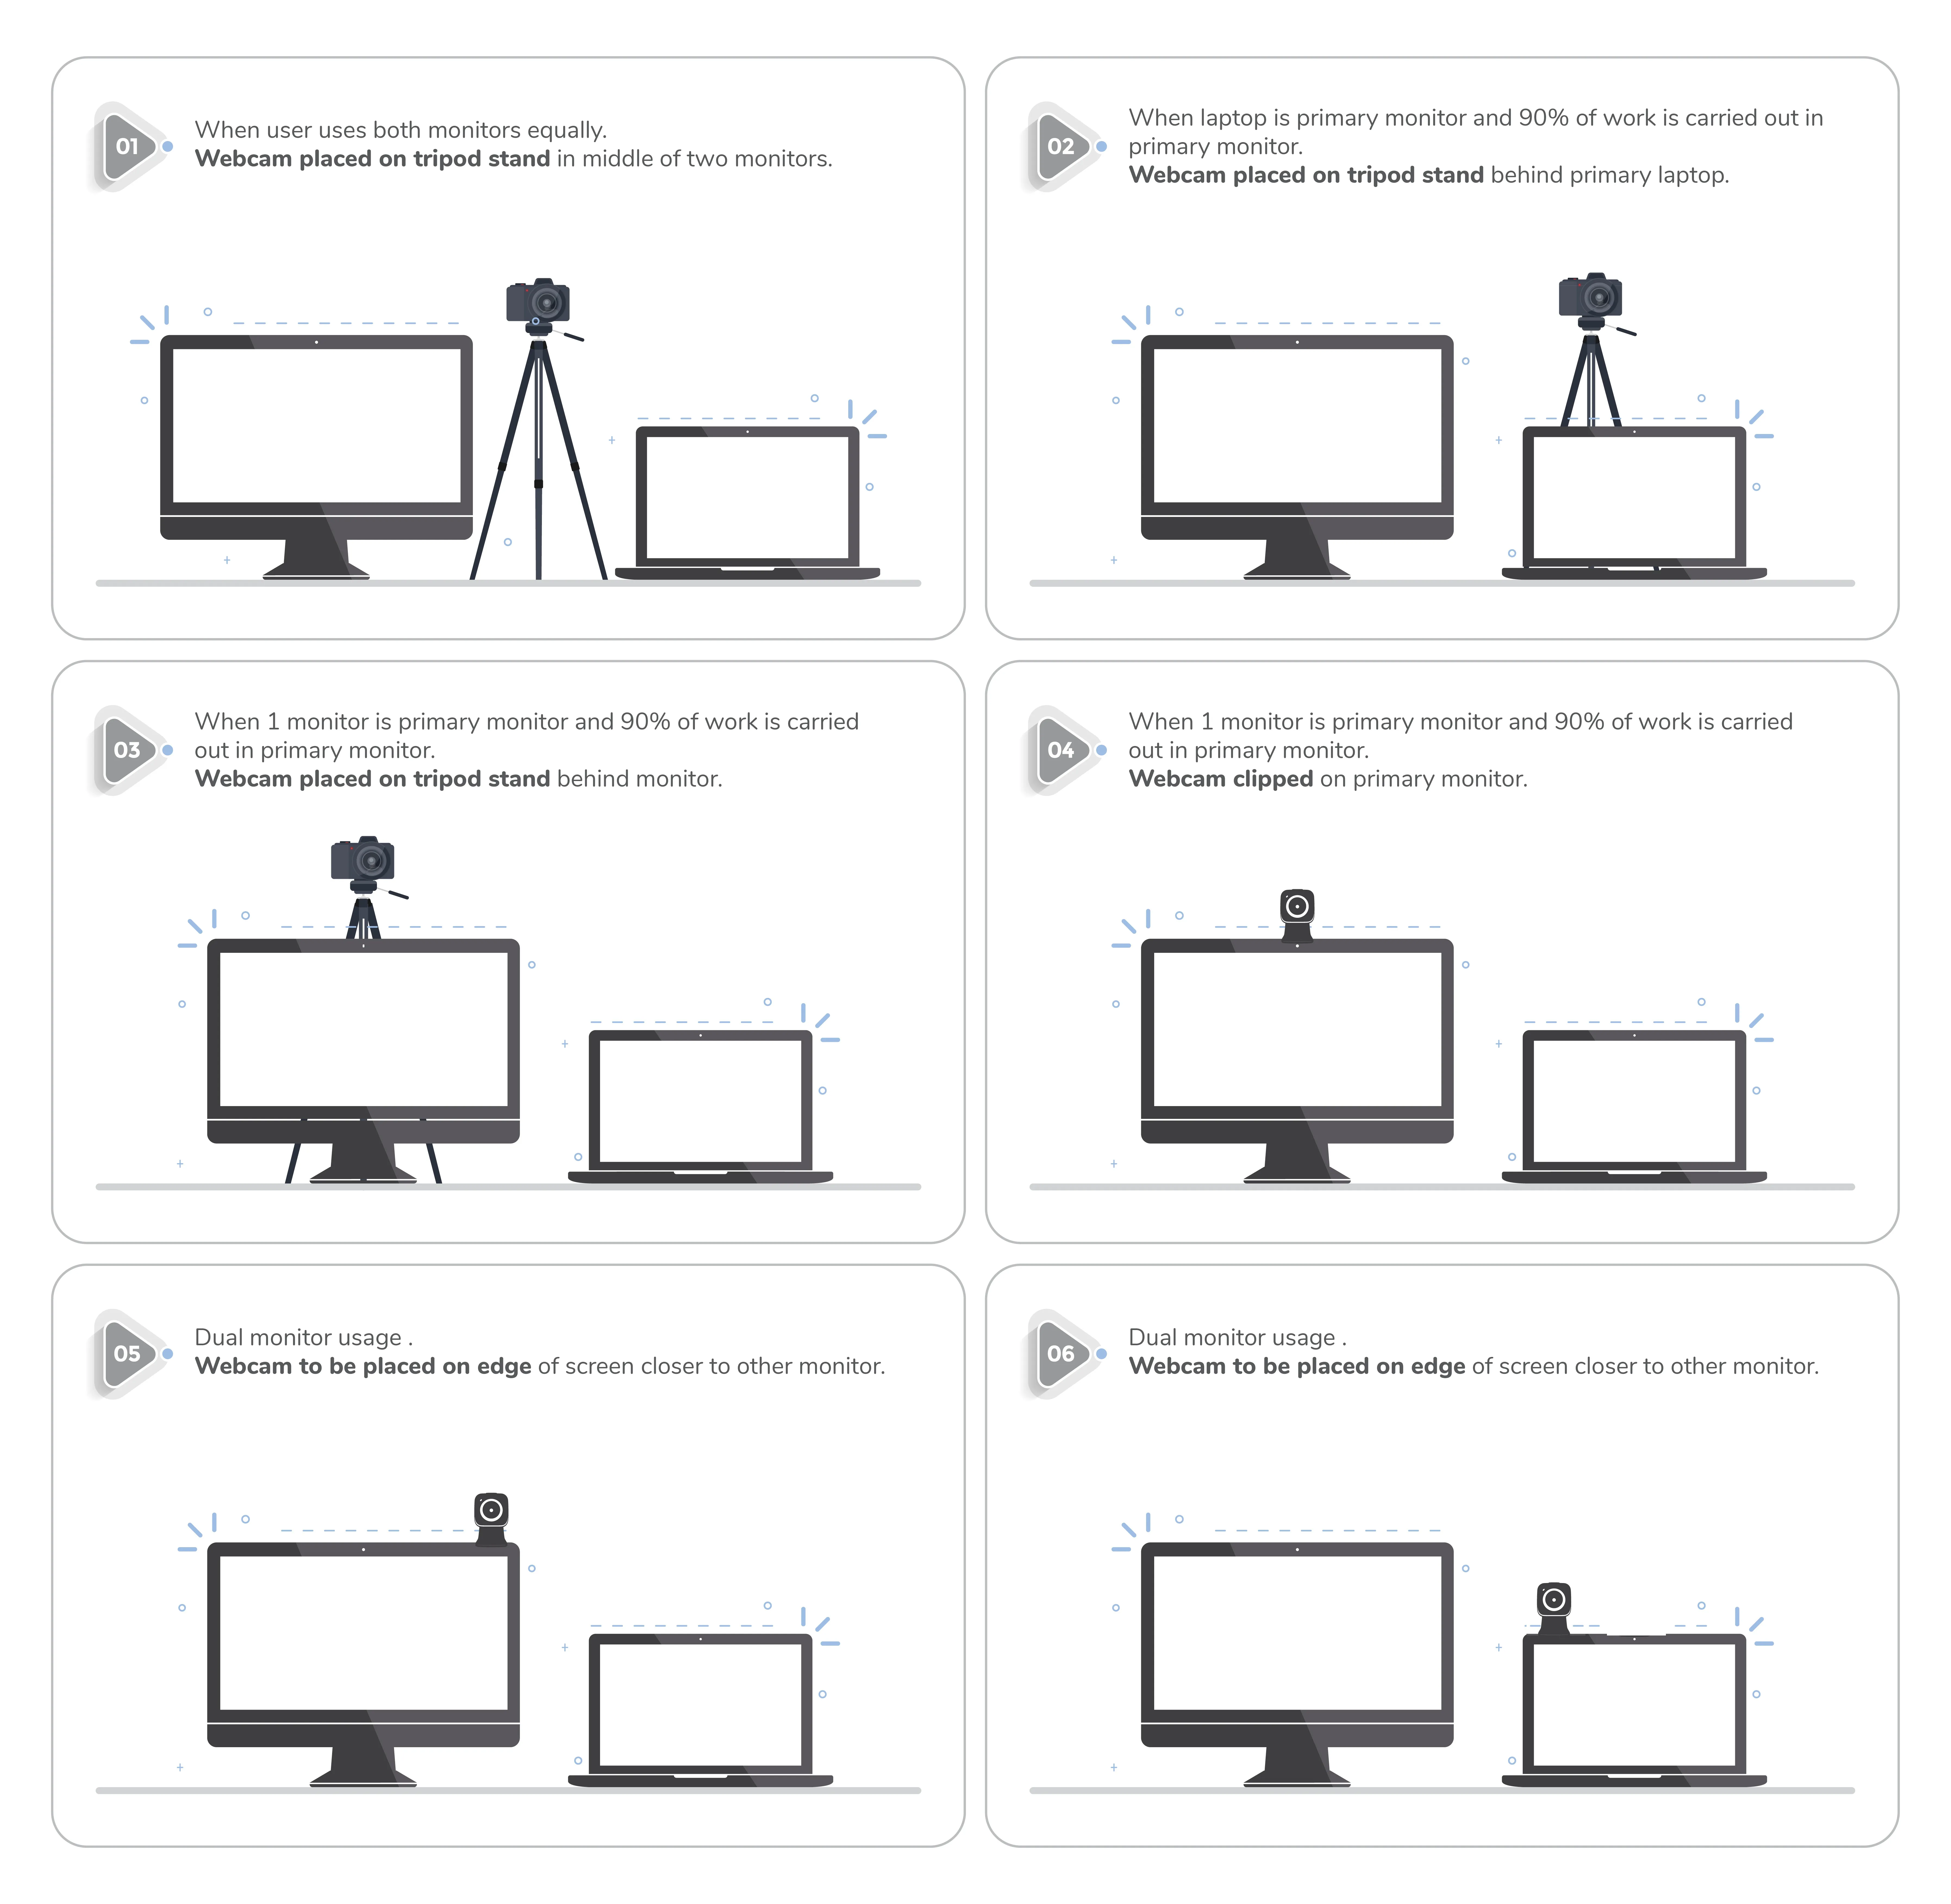
In case you have dual monitors then below are few scenarios on how can you place the camera for successful face authentication
Help
The Help button (?) opens the SWFH Agent User Guide in your default web browser.
By default the button opens the online SWFH documentation portal. Your organization can configure it to open a different help page.
